The Setup
This will serve as a two part post regarding the setup and accomplishment of applying a Marine Ceramic Coating, as well as a review of my thoughts on the Mckee’s 37 Nautical One line of products that I used to achieve the results of my Marine Ceramic Coating.
** Side note: My boat is 100% lift kept. You will need to be able to trailer *and* keep the boat dry for approximately 24 hours before putting it back into the water so that the coating can seal properly.
Disclaimer: The information set here is my own, your mileage may vary. I was a professional detailer in college so there are techniques used that I have not described in detail. I also was not paid to advertise on any products listed below, I simply believe they worked well. Finally, no, I will not do your boat for you.
The decision
I knew that the boat needed a wash. And more than a wash, a solid cleaning to get her back to a shine. I took a small polishing pad out with some automotive grade (probably a Mckee’s 37 product. You may to start noticing a trend here!) polish, and did a quick hand polish on a small section at the bottom of the hull *after* washing the boat on the lift. The difference in the tone of white that I was able to reveal was startling, and indicated that despite frequent use of a wash brush and hose (fresh water only), the hull was beginning to stain.
I began to research and ask neighbors what they were using, and most were using some type of compound and wax. After reviewing the process of prepping for wax, I recognized that I was essentially prepping for a ceramic, sans one step for the coating prep. The determining factor was that if I was going to spend 90 hours prepping for wax, only to probably need to do it again in 6 months or a year (at most), I might as well toss a ceramic product on and get the boat completely sealed up. I actually found that the ceramic application process was easier, faster, and more rewarding than the waxing process. In short – I’m sold. The *are* some caveats to this, which I’ll outline below.
During this, I used the following products (linked below):
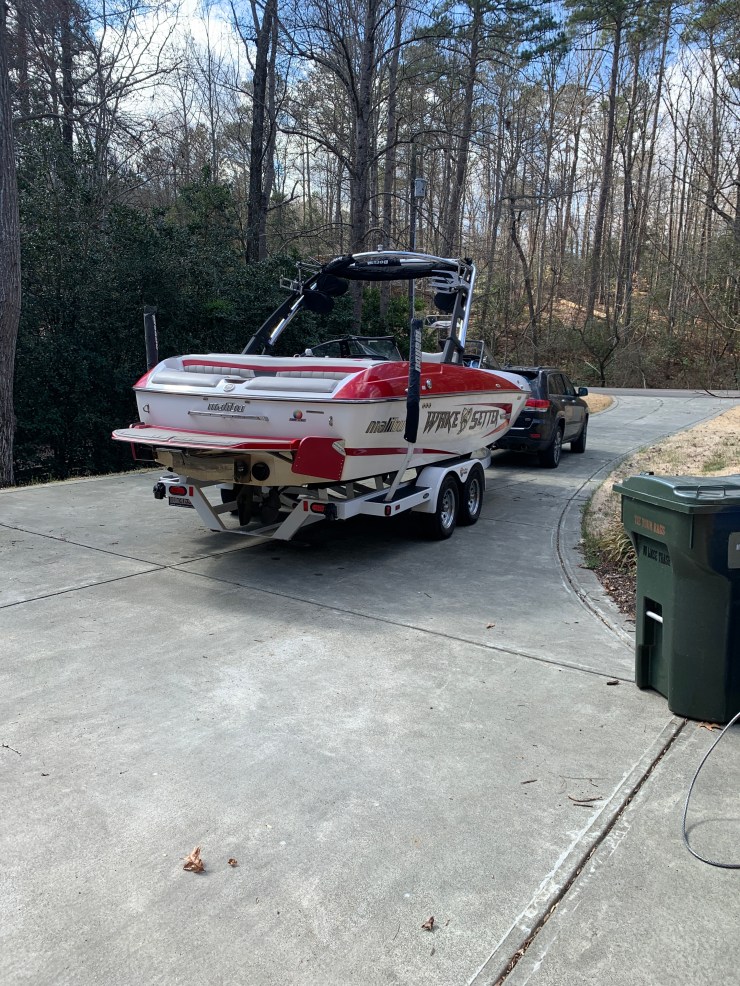
2013 Malibu Boats Wakesetter 22MXZ
Mckee’s 37 Nautical One Polish
Mckee’s 37 Nautical One Ceramic Coating
Mckee’s 37 Nautical One Fast Cut Oxidation Remover
Mckee’s 37 N-914 Rinseless Wash Spray (diluted to 8:1)
Prep:
I pulled my 2013 Malibu 22 MXZ out of the water with my wife’s 2018 Jeep Grand Cherokee Overland with the 5.7L V8 Hemi engine. It did fine in the neighborhood, however wouldn’t want it on longer trips due to the short wheelbase.
Wash
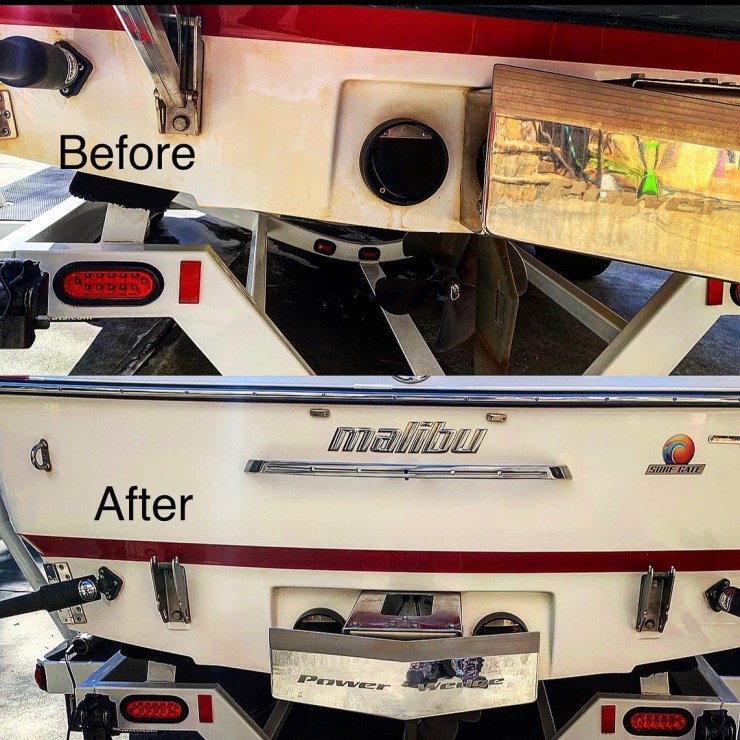
Starting with the back of the boat, I pulled the swim platform, removed the surf gates, and pretty much got anything/everything out of the way of the orbital. I then washed the boat using the two-bucket method, scrubbing the hard to reach areas with a soft-bristle brush with a telescoping handle, and using a microfiber mitt for anything that I could more easily reach. I finished this off by drying the boat with a super-chamios.
Polish
Before starting on polish, a quick note about marine gel coat. Marine gel coat is quite hard, and you can really apply a lot of pressure to it when using a dual-action or orbital polisher. Most professionals will use a rotary with a wool pad (basically the most abrasive combo you can get short of a wet-sand). Personally, I’m comfortable with my Porter Cable, and I know that a yellow pad will do a great job even if I have to work at it a bit longer or do an extra pass over the same area.
After dropping the wakeboard tower, putting it in the garage, and kicking it sideways so that I could close the garage door, I started with the back of the boat using McKee’s 37 Nautical One Marine Gloss Restoring Polish on a Red Line yellow pad.
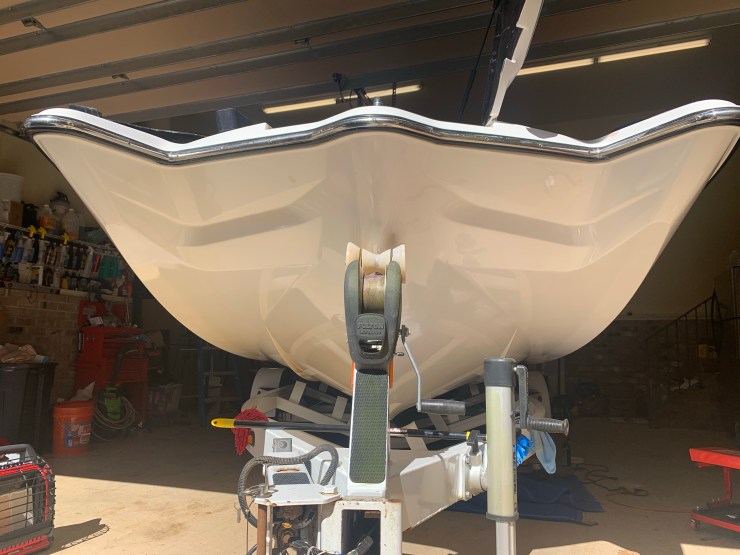
Pto-Tip: the trailer will *not* protect you from a concussion on a pickle fork bow the same way it will on a traditional bow. Ask me how my head knows!

This is a mild abrasive polishing compound which is perfect on areas of gelcoat that are still in good shape, but may have lost their shine. It’s also phenomenal at water spot removal when you’re using an orbital. I then worked my way around the boat, only running into issues at the nose where I could not get the entire orbital into some of the reverse-angles that accompany a pickle-fork wakeboard boat. I switched to a drill attachment with a 3″ pad for these areas.
After the sides were completed, I got on my back and under the trailer. I wasn’t able to do the sections that were covered by the bunks until it was back in the water and I was able to get underneath the boat. I also took this opportunity to validate that my running gear was in good order and that I didn’t need to do any repairs while I was there.
Heavy Cut
I did have a few sections that needed a bit of extra grit to get through some scratches (most likely where bumpers hit the gelcoat when rafted up). My go to for this is Mckee’s 37 Nautical One Fast Cut Oxidation Remover with a RedLine Blue/Green abrasive pad. This knocks out oxidation in a way that I’ve only seen wet sanding take care of, but it does it with an orbital. You’ll need to follow this step with the Gloss Restoring Polish, and I only do the Fast Cut on sections that really need some extra attention so that I’m not harsh on the entire boat.
Coating Prep
Once you’ve completed compound, the boat looks amazing, but now you need to seal in and protect the work you’ve done. The first step to doing this is to make absolutely sure you’ve gotten all of the impurities from the polishing compound off of the boat. I did this using Mckee’s 37 N-914 Rinseless Wash. This is one of the most versatile chemicals at my disposal, as the dilution ratio enables it to be used for different purposes, based on the table below. I’ve successfully used it as a waterless wash, rinse less wash, and a paint prep/coating prep cleaner.
Rinseless Wash 1:256 (one ounce per two gallons of water)
Waterless Wash *or* Clay Lubricant 1:128 (one ounce per gallon of water)
Paint-Prep 1:8 (one ounce per 8 ounces of water)
Water Softner – one ounce per wash bucket (along with your regular car wash soap)
I diluted to 8:1 and sprayed down the boat, wiping it immediately after with a micofiber towel. At this point, I was ready for ceramic.
Ceramic
Mckee’s 37 Nautical One Marine Ceramic Spray is about as easy of an application as you can get, save for one key consideration: It’s in a spray bottle. Much of my gelcoat is above the rub rail, and I have detail pieces (SeaDek, traction pad, wakeboard tower, rubber for the windows, etc) that I didn’t want to accidentally ceramic coat or contaminate my towels by rubbing across. A quick call to Nick Rutter from Mckee’s 37 informed me that I could apply above the rub rail (or the entire boat, according to him) with the old-fashioned way of using a sponge with a bit of the ceramic on it, and then wipe twice as though you’ve used the spray bottle.
So – for above the rub-rail, I cut down an extra ceramic coating sponge that I had from ceramic coating my Audi RS3, and gently ‘sprayed’ a couple of lines of ceramic coating onto it. Following that, I wiped down roughly one square foot of my gelcoat above the rub-rail, wiped immediately with a microfiber cloth, and then wiped one more time with a fully clean cloth to buff off any excess. It’s important to note that I use a specific color microfiber for ceramic, and after the first use they are immediately thrown away as the silica from the ceramic becomes hard and abrasive after it cures to the microfiber cloth. This prevents me from accidentally mixing them up.
Once below the rub rail, I turned to the instructed method of spraying on a roughly 2’x2′ area and wiping down with a microfiber, and then wiping down one more time with a different microfiber.
After this process has cured for ~12 hours (I waited 36 due to weather), the boat is ready to back in the water!


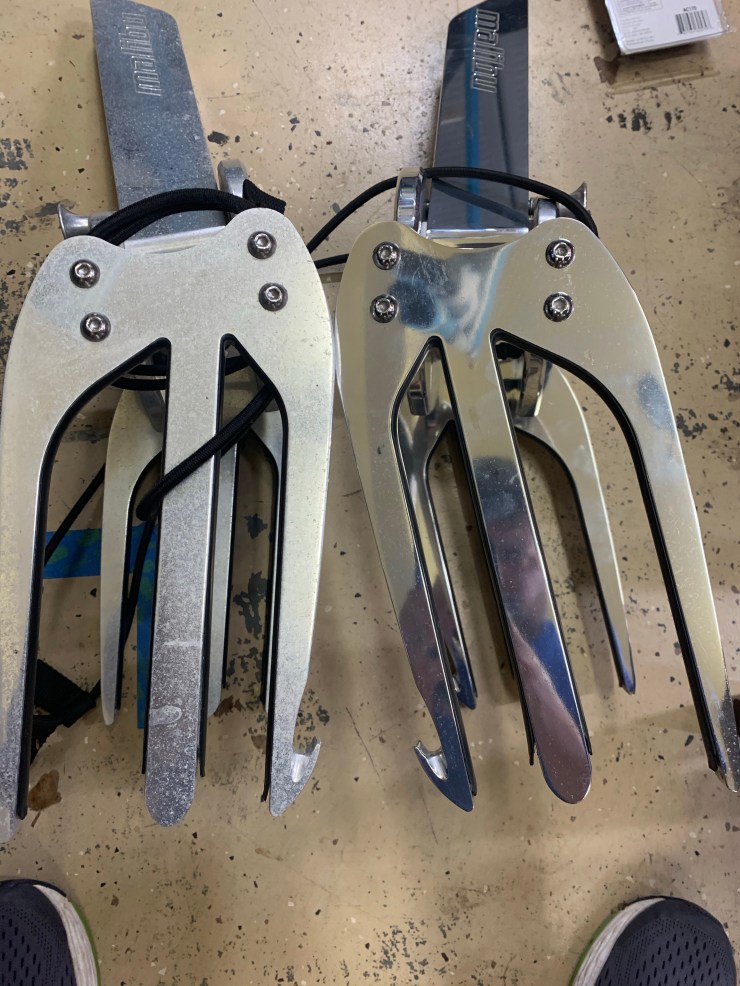
Tower Racks:
On my previous boat, a Super Air Nautique SV-211, I had the factory Team Edition tower speakers. I was able to use Mckee’s 37 Fast Metal polish to make them shine quite nicely, and then topped them with an automotive ceramic (it was all I had at the time). I decided to tackle the forks from my wakeboard tower racks as they needed a bit of TLC. I actually fully took them apart, clamped them to a post, and went to town with a Red Line yellow pad (I bought in bulk… and it worked!) After re-assembling, I sprayed them down with N-914 spray, and then followed up with the Nautical One Marine Ceramic. There is still some etching from being exposed to the elements, however I’ve stopped the damage, and sealed in what I could. I’m pretty pleased with the results!


Maintenance:
I maintain my ceramic coating by doing a few things:
- Once a week I wipe the entire boat down with N-914 in the waterless wash setup (1:128). I use a soft bristle brush to knock off any sediment that has adhered to the hull.
- Once a month (every 3rd week, if heavy use) I wash the boat, and follow up with Mckee’s Nautical One Hydro Rinse Coating. This is essentially one of the spray on/rinse off treatments. I feel that it may extend the life of the ceramic. Perhaps it’s not necessary, but it restores (very quickly) that beading that we all love to see. Worst case, I may get a few extra months out of my ceramic that’s been applied, so for the cost and the extra step, I’ll take it!
Conclusion:
It has now been about a month and a half (6 weeks) and I’m on my second ‘maintenance’ washing Hydro Rinse. I’m extremely happy with the results, and aside from the massive quantities of pollen that we can’t do anything about due to living in the southeast, the water still sheets away and simply doesn’t want to stick to the hull. I’ve gotten more comments and compliments on how great it looks than I thought I would and have recommended this process to many people. Please comment below with what you’re working on and tag me in any photos you post!
